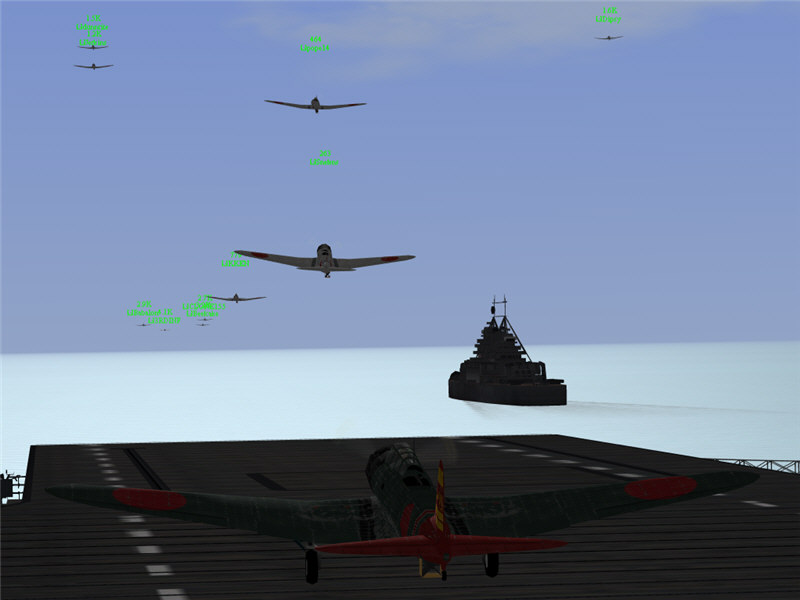
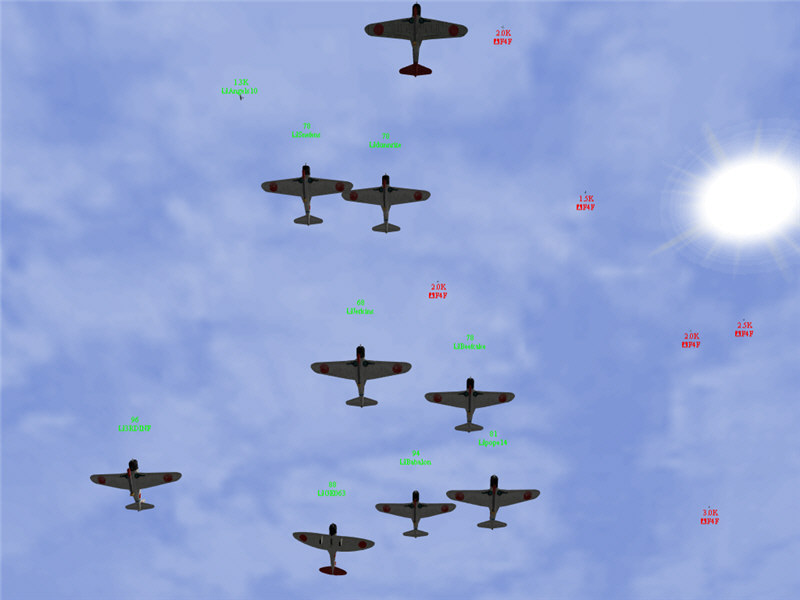
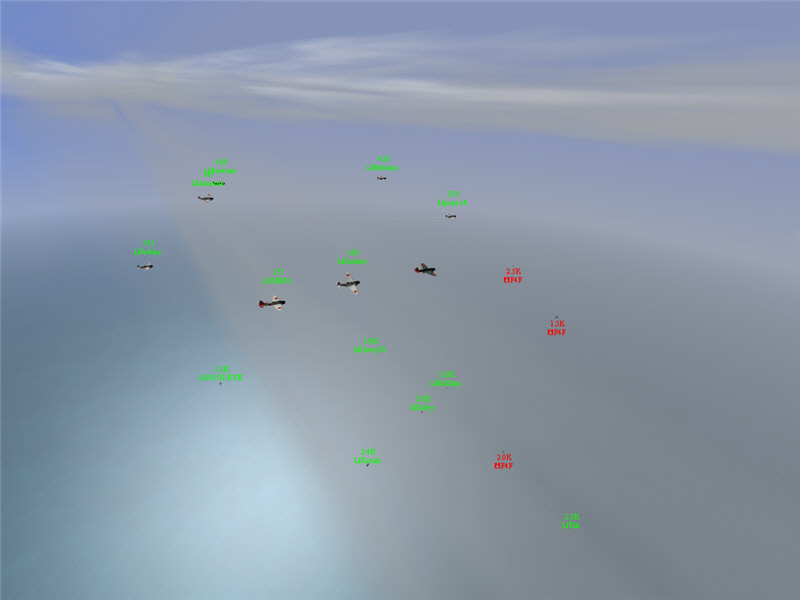
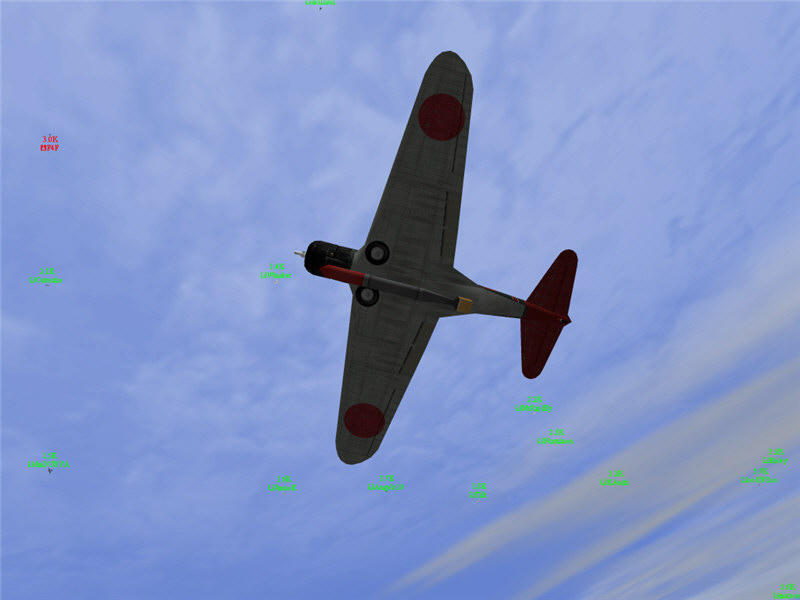
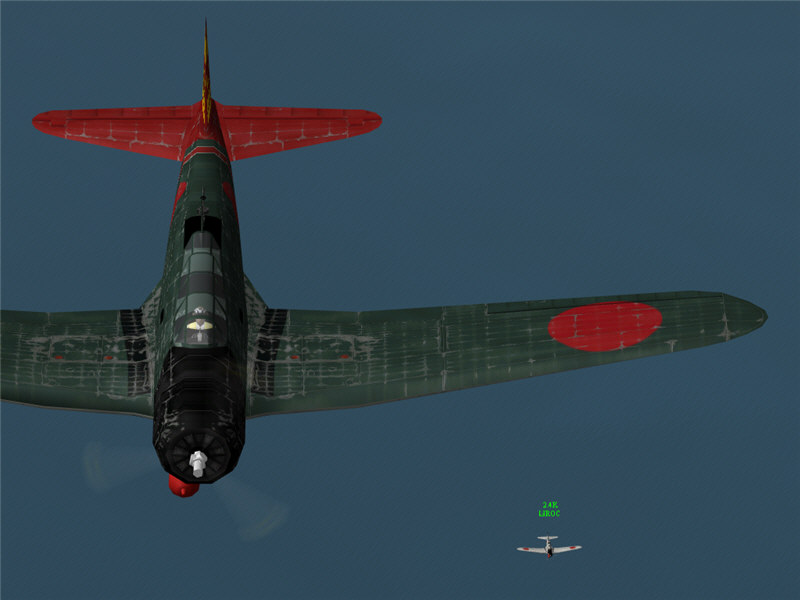
VT-Z taking off in our B5N2 Kates from the Zuikaku. The cruiser Myoko is in the foreground. From top to bottom: Dipsy, dunnrite, Jerkins, pope14, Snefens, KKEN, CLONE155, Babalon, Beefcake, 3RDINF, and me (Brooke). t=0:02
After-Action Report
8/8/2009
by Brooke, GL, VT-Z
This was a scenario that ran in the multiplayer on-line air-combat simulation Aces High.
I was the Group Leader (GL) of VT-Z, the torpedo-bombing squadron on the Japanese fleet carrier Zuikaku. We were flying B5N2 Kates. Today, VT-Z consisted of me (Brooke), KKEN, ROC, Babalon, pope14, Beefcake, dunnrite, Dipsy, 3RDINF, CLONE155, Jerkins, Snefens, and Teufel.
VT-Z taking off in our B5N2 Kates from the Zuikaku. The cruiser Myoko is in the foreground. From top to bottom: Dipsy, dunnrite, Jerkins, pope14, Snefens, KKEN, CLONE155, Babalon, Beefcake, 3RDINF, and me (Brooke). t=0:02
A view down from above my B5N as I help coordinate the rendezvous of VT-Z with VT-S (the torpedo squadron from the Shokaku), VB-Z (the bombing squadron from the Zuikaku), and VB-S (the bombing squadron from the Shokaku). We picked out an island in 9.11.5 as an RV point. From left to right: ooUFOoo, me, Wmaker, Kotari, Kantii, Tilt, MrRiplEy, matson, Nurminen, JanneK, dmDUBYA, prono, Flushed, and 4884. t=0:24
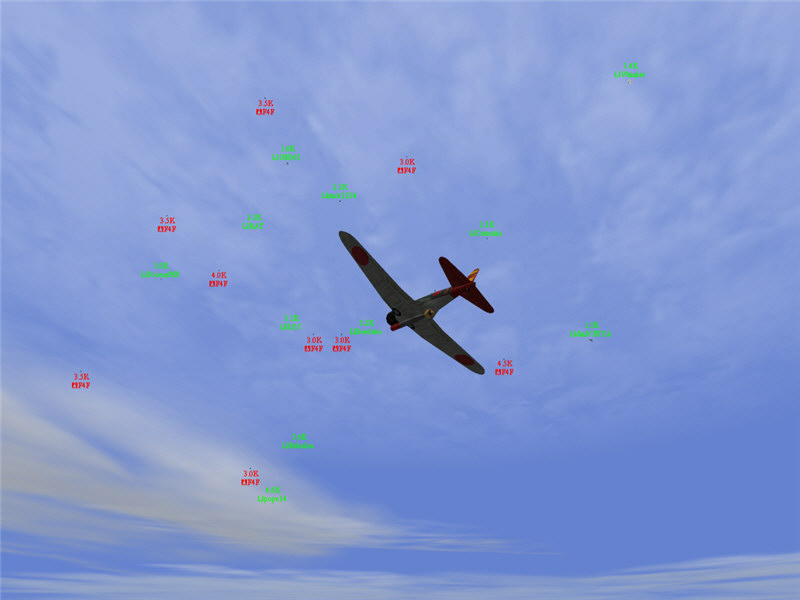
A view behind my plane as I lead the strike force south. The IJN hasn't found enemy carriers yet, but they are out there somewhere, so we continue south. VT-Z is up at about 19k altitude. From left to right: Wmaker, Kotari, matson, Nurminen, (can't tell), dmDUBYA, JanneK, Flushed, Snefens, MrRiplEy, (can't tell), me, pope14, 3RDINF, GE063, Babalon, ooUFOoo, Jerkins, ROC, dunnrite, KKEN, and Dipsy. t=0:38
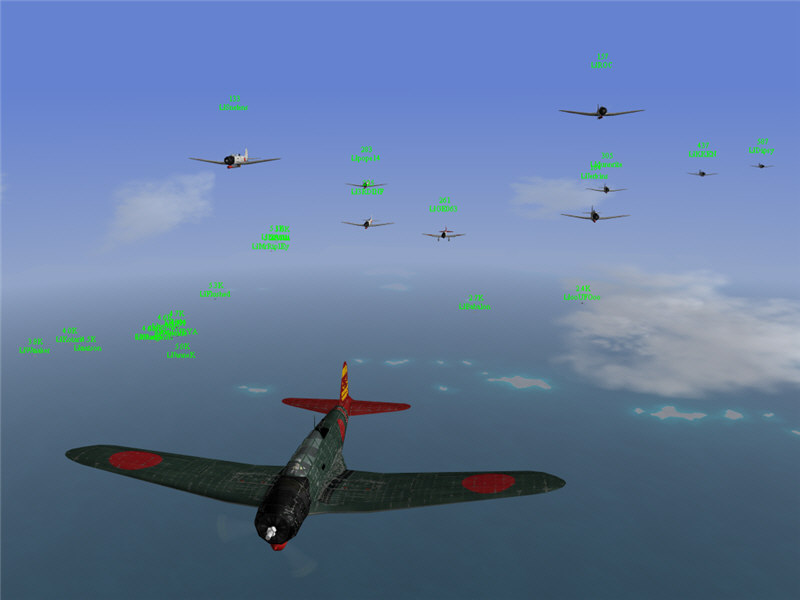
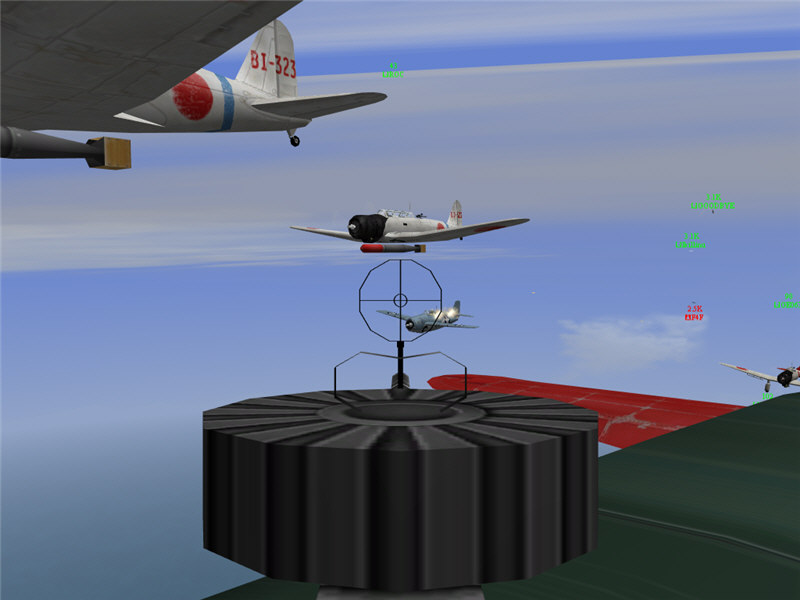
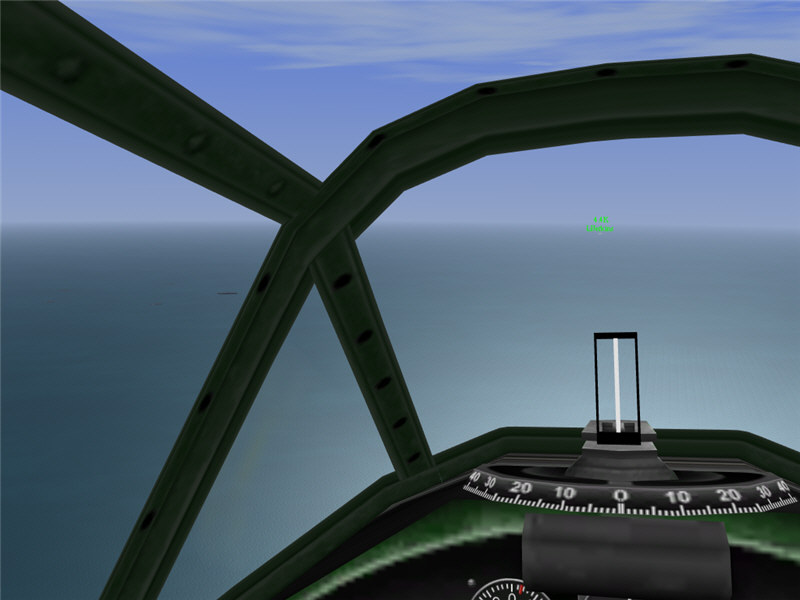
A view out of my cockpit as we see bogies coming ahead (the black dots up and left from my torpedo sight). We are in 9.9.5 heading south. I'm hoping that they are Zeros, but I fear that they are F4F Wildcats, as I haven't seen many Zeros ahead of us on forward escort. Unfortunately, they do turn out to be F4F's. In front of me are Ikillinu and zack1234. t=0:41
A view from below me. The F4F's overfly the lead elements of our strike force before split s-ing on down. VT-Z is in a very nice, tight formation. I call for bombers to dive if in trouble. That way, they drag enemies low and either survive (if the enemy breaks off) or take an enemy out of the fight (if the enemy follows them down). From top to bottom: me, Angels10 (one of our Zero escorts above us), Snefens, dunnrite, Jerkins, Beefcake, 3RDINF, pope14, Babalon, and GE063. t=0:42

One of the F4F's makes a run on our formation, aiming at me or Snefens. I'm wishing for the rear gunnery of the TBM, as our B5N's have no field of fire below rear (which is why the F4F is approaching from there). Such a nice, tight formation of TBM's would give an attacker much trouble. We have 5 Zero escorts for the strike force. I'm hoping that the strike force's size along with 5 Zeros will be enough so that most of the strike group makes it past this enemy intercept. We're at 19k, so if the F4F's get pushed down a little, they'll be out of the fight. From left to right: ROC, Snefens, me, Jerkins, GE063, dunnrite, Babalon, DaveyJ2 (back a ways, chasing in -- I think -- a Zero), and Beefcake.
A view from my rear gun position as I put some rounds into the attacking F4F. I don't think we lost anyone to his attack run. From left to right: Snefens, ROC, Ikillinu, GOODBYE, and GE063. t=0:42
The Wildcat goes past me and presents what would be a beautiful target for Snefens (left) and me (right) if only we had forward guns.
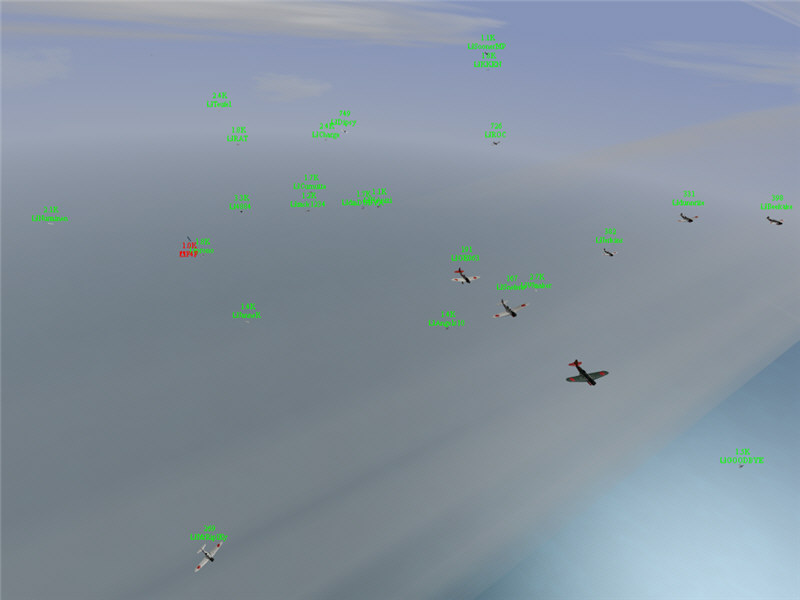
A view back and left from my position after the fight has been running a bit. We are in good shape so far back there. We have lost some planes, but not the majority of the strike force. From left to right: Nurminen, MrRiplEy, prono, Teufel, RAT, 4884, JanneK, zack1234, Curnutte, Charge, Dipsy, dmDUBYA, KAntti, Angels10, GE063, SoonerMP, KKEN, ROC, Snefens, Wmaker, me, Jerkins, dunnrite, GOODBYE, and Beefcake. t=0:44
A view forward and left from my position at the same moment as above. All other locations are clear. We are in good shape so far (although the attack naturally spread us out a bit). From left to right: Jerkins, dunnrite, Beefcake, GOODBYE, GE063, Snefens, Kotari, DaveyJ2, Babalon, Ricky, me, Ikillinu, pope14 (who has a fuel leak), and Tilt.
Unfortunately, more F4F's come rushing in. Now we are in trouble, as I'm sure our 5 Zero escorts are scattered from the immediately previous attack. There are now 16 F4F's in the area. I get out a radio report of the situation (i.e., we are in big trouble under attack in 9.9.5). t=0:45
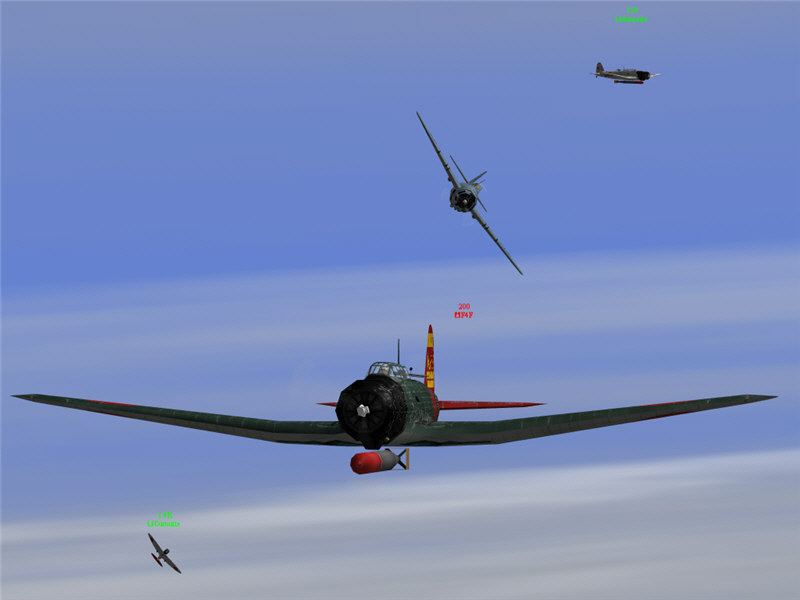
One of the new F4F's attacks me. I slam my stick forward and stomp rudder, jinking, then go into a high-g turn. From left to right: Curnutte (who is trying to get on the F4F, using his D3A as a fighter), me, and dunnrite.
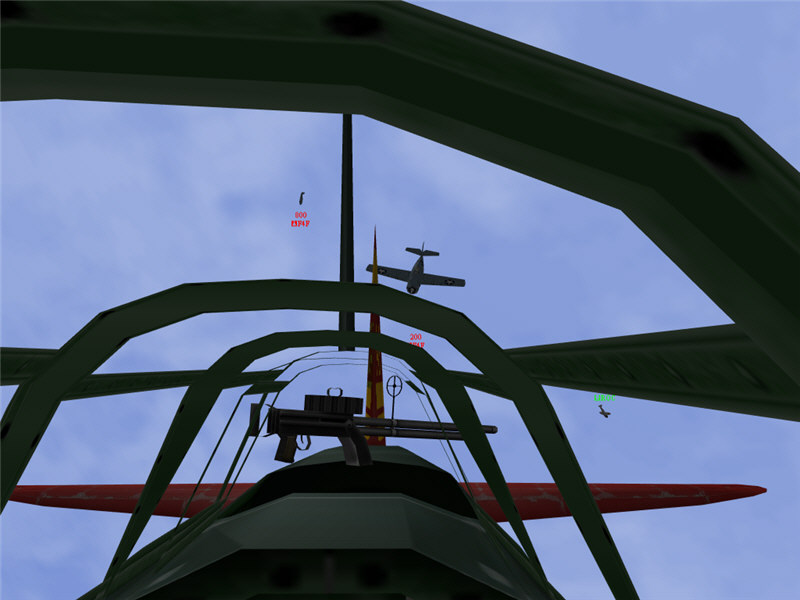
A view back, out of my cockpit. The F4F works to stay on me, so I go into a high-g diving spiral, staying out of his line of fire. The B5N can turn very well, and I'm using that for my defense. Also visible in the picture is ROC. This F4F is persistent, forcing me to lose much altitude and keep pulling lots of g's, but he eventually gives up once I get down to about 10k altitude. He doesn't want to blow all of his altitude for one plane. t=0:45
A view up and to my right after the F4F breaks off. That side is fairly clear, and lots of the strike force is still left. From left to right: Curnutte, dmDUBYA, Wmaker, JanneK, Ikillinu, me, Angels10, Tilt, MrRiplEy, Nurminen, KAntii, ooUFOoo, risky, and matson.
A picture ahead of me at the same time as previous picture. (I think this is actually to the north of me. I got turned around heading north during my evasion and haven't gotten my bearings and turned around yet.) This isn't looking as good. Folks up there are in trouble, although the F4F's will probably have their hands full killing all of those planes if they dive, evade, pull lots of g's, etc. From left to right: SoonerMP, RAT, pope14, GE063, ROC, Babalon, zack1234, Beefcake, me, Curnutte, and dmDUBYA. t=0:46
After this, I look around, turn south again (instead of north), and look for a gap among enemies to make a run for it southward.
Someone warns me on the radio of an F4F making a run on me. A quick view back, and I go into a hard nose-low turn, easily evading. Thanks for the warning! The F4F doesn't follow me into the turn and breaks off. This view is looking back north, and the situation is a bit less dire than it was in the previous picture for the folks north of me. There are still enemies probably shooting down planes, but there seem to be more friendlies than enemies, and unengaged folks are starting to head south away from the furball. From left to right: SoonerMP, ROC, Wmaker, zack1234, Nurminen, JanneK, DaveyJ2, GE063, and MrRiplEy. t=0:47
I dive for speed and head for a cloud south of me. I think I'm going to get clear of the fight, but then an unusual and violent weather condition rips through the area, downing much of our remaining strike force. (I.e., we had a mass system crash affecting our side.) The survivors of the weather do not live to make it to the enemy carrier. t=0:49
After the severe weather condition, VT-Z relaunched. About this time, scouts found an enemy carrier way, way south -- down in sector 10.5. Ug. We groaned about how far south the enemy carrier was, and wished a closer one was found, but started our long flight south. We picked up 2-3 Zero escorts for VT-Z and hoped for the best. We passed near an enemy cruiser group in the 10.9 area as we went south, and it probably alerted the enemy to our presence. There was another cruiser group reported in 11.7.1, but still no sign of the other US carrier. Meanwhile, the enemy attacked the Shokaku and sank it. We continued south.
Unfortunately, after getting all the way down there and probably making it into the radar circle of the carrier, we got jumped by a bunch of F4F's, many more than 2-3 Zeros could handle. I evaded repeated attacks, losing altitude all the while. Eventually, I was on the deck trying hopelessly to evade the 3-4 F4F's that were on me. I was just trying to get any one of them to crash while trying to shoot me down, but I didn't succeed. All of VT-Z was shot down. I didn't get any screen shots as, after the previous crash, I had forgotten to turn on my gun camera.

VT-Z and the Zuikaku. In foreground, Brooke and Dipsy fly past the deck of the carrier. Others from left to right: Teufel, Snefens, Beefcake, KKEN, Jerkins, Babalon, and pope14. t=0:03
At first, since it was so late in the day, our orders were to spread out around the Zuikaku and act as scouts for any late incoming enemy raid. Some of the guys jetisonned their torpedoes, but many of us kept ours just in case. I asked our CO if we could go attack the enemy cruiser that was spotted in 10.9.5. After we scouted a bit, he did send those of us with torps over to do that. Since we were spread out from scouting and as it would be very tight to get to the enemy cruiser before the end of the day, I didn't pick a rendezvous point and just had all of VT-Z head best speed to the last reported location of the cruiser.
ROC and I on our way to the enemy cruiser. We were close together. There were some other pairs of folks close together, but VT-Z overall was spread out over about 25 miles.
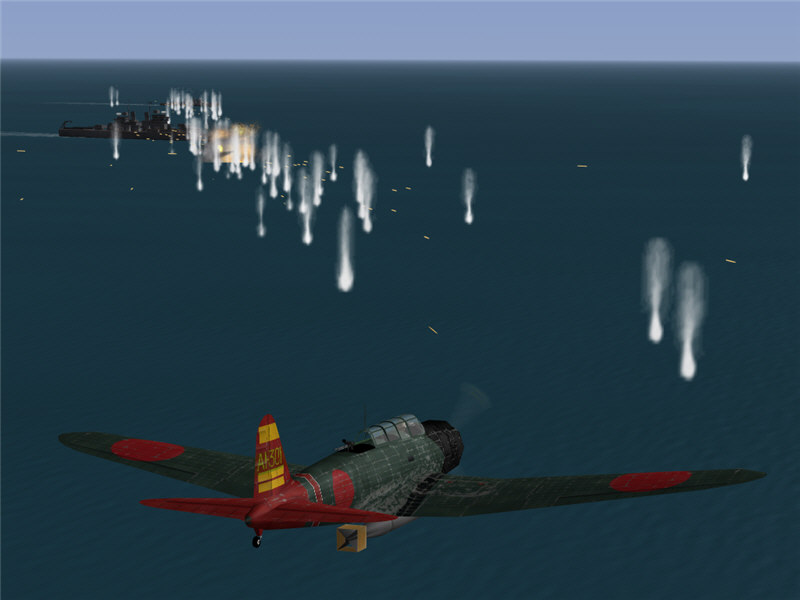
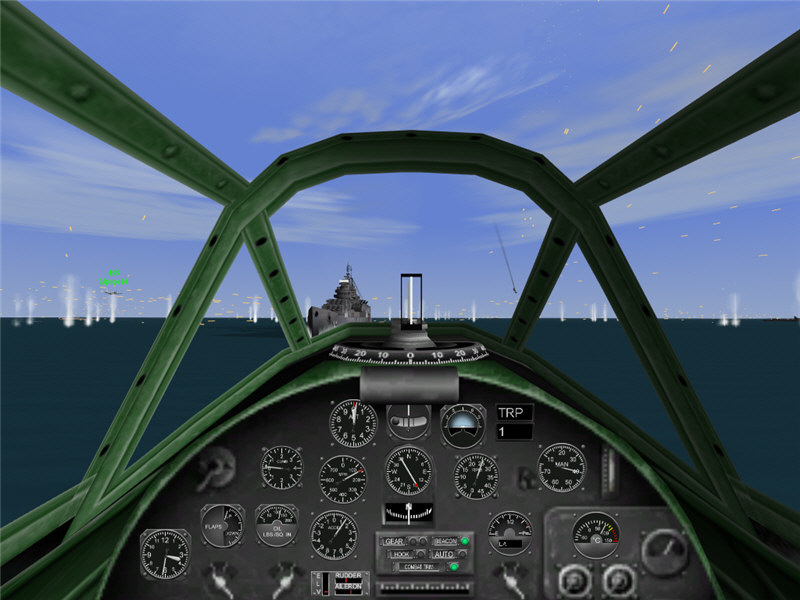
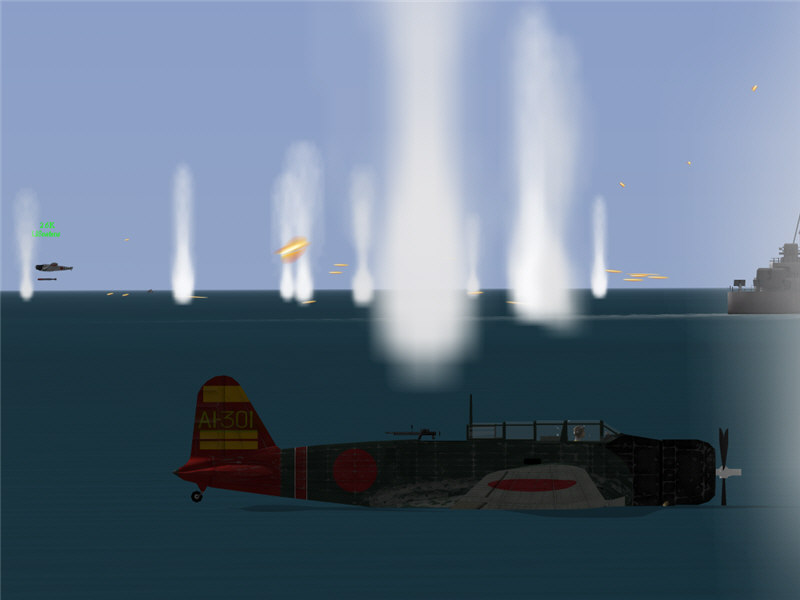
I sight the enemy cruise (left portion of the picture). Along the way, I came across Jerkins (who is about 4000 yards ahead of me) and pope14. They spotted the cruiser first and gave us a precise location report. At this point, we have about 5 minutes left to complete our attack -- not much time, and I'm worried that not all of us will make it in time. I dive straight toward the cruiser, following Jerkins in. t=0:31
A hail of AA fire explodes Jerkins' plane just as he is about to drop. I was following him in. I call, "Warning! Manned ack! Manned ack!" on the radio and veer off to the right to stay out of its range for a bit. Since I know gunners just raked over Jerkins on a right-side approach, I decide I'll swing around and attack from the forward left, hoping that they don't have ack coverage there or at least a less-alert gunner. Also, it buys me time for others to approach so that we won't be going in singly. t=0:31

I crank into a hard left turn for my forward-quarter approach. The cruiser starts to turn into me. pope14 and mlkmlk are coming in from the right side. So, we will have a simultaneous attack from two directions.
Torpedo away! pope14 is pressing in from my left, and mlkmlk's plane on the right (I think it's mlkmlk) is trailing smoke and mortally wounded, in the process of crashing into the sea. t=0:32
A view out of my cockpit as I drop my torpedo, leading to account for the turning cruiser.
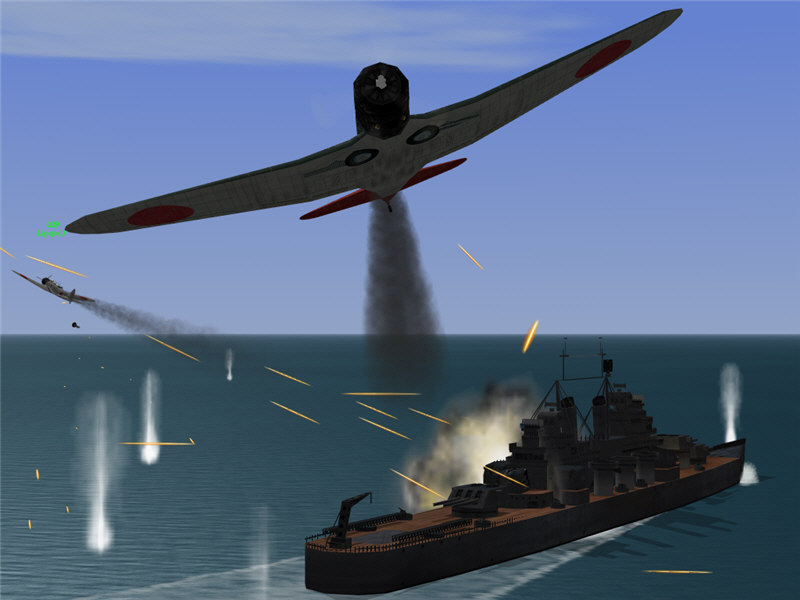
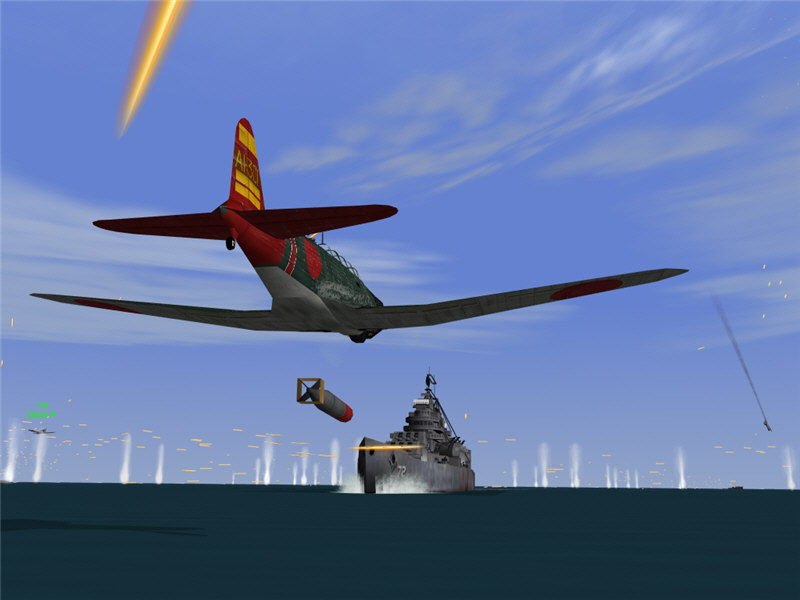
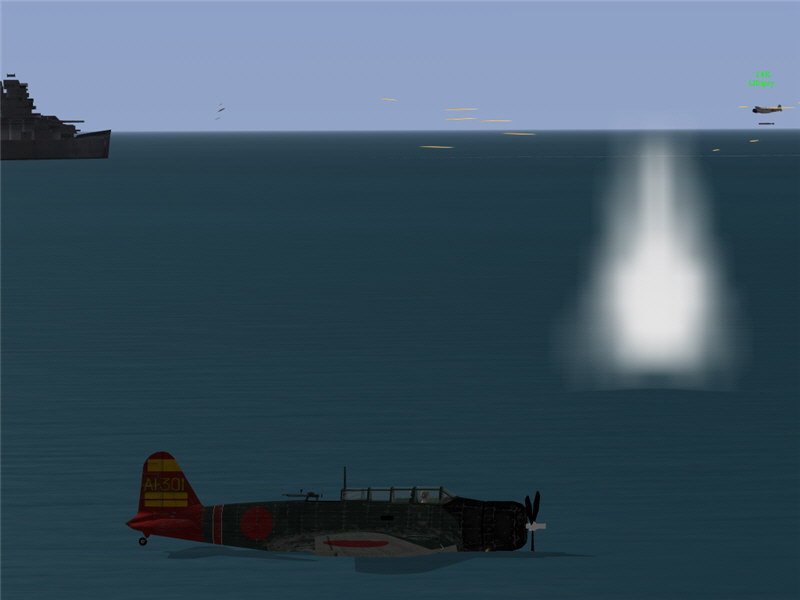
My torpedo detonates, left side amidships. I pull up and over the cruiser to get onto the right side of the cruiser, to draw some fire for anyone else coming in on the right. pope14 (left side of image) has been all shot up. His engine is dead, spooling down. His plane is shedding parts and trailing smoke. My plane comes under immediate fire once I cross over onto the right side of the cruiser, and my engine also is shot up. Oil sprays over my windshield, and my plane is trailing smoke.

My torpedo sets off secondary explosions all around the ship. I call on the radio, "Hit! Hit!" Unfortunately, pope14's plane explodes shortly after this, and my engine quits.
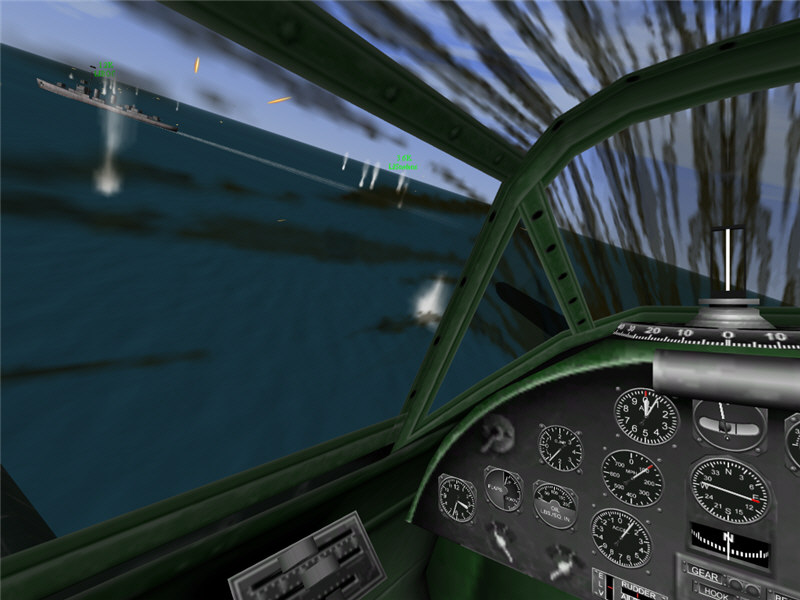
A view forward left, through my oil-steaked windshield, as I turn left, trying to remain in the cruiser's left-side field of fire. I'm hoping to tempt the gunner to shoot at me instead of at any other VT-Z pilots coming in. But without an engine, with no altitude and no airspeed, I can only do a bit of a left turn, then ditch it in the water. ROC is making his run with Snefens following. On the radio, I warn people that the gunners are deadly.
I watch from my ditched B5N. ROC's plane is set on fire from the AA and explodes shortly thereafter. t=0:33
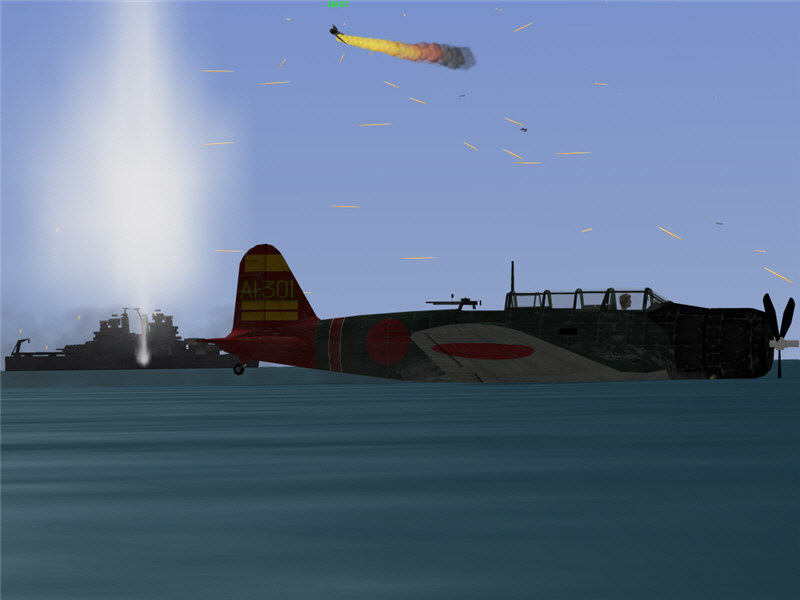
Snefens comes in next (left side of image). His tail is blown off, and he immediately releases his torpedo. He is close in at the drop point and aimed on target.
Dipsy comes in next and releases his torpedo.
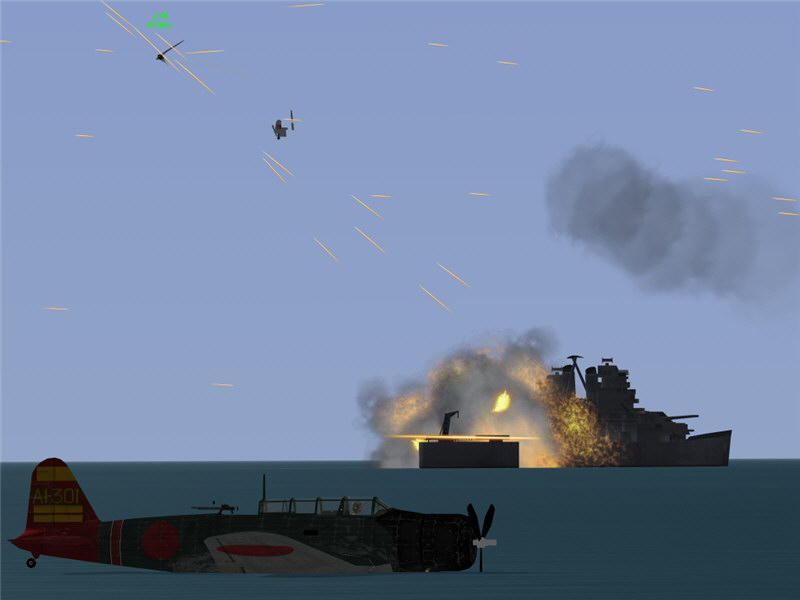
A torpedo slams into the cruiser, setting off large explosions. Dipsy's plane disintegrates under AA fire. The torpedo hit is from Snefens -- he gets objects destroyed. t=0:34
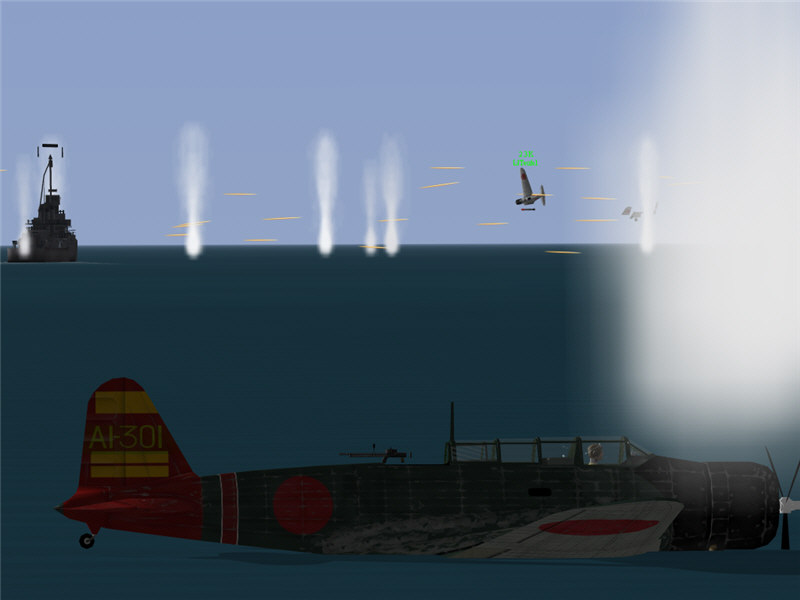
Teufel makes the final run. His wing is blown off before he gets close. He drops his torpedo immediately, but it is too far out to hit.
Alas, VT-Z was not able to sink the cruiser. We got two torpedo hits on it, but the gunners took out everyone, including several people during their torpedo runs. We did get our shot at it, though, for which I was grateful.
I got a torpedo hit on one cruiser, got disconnected once, got shot down once, and ditched once, not making it back to base.
VT-Z was shot down out prior to attacking any carriers. It attacked one cruiser with manned ack and managed two torpedo hits just a few minutes before end of the day.
-- Brooke, GL, VT-Z